
Receiving a new product sample is exciting, but a single overlooked flaw can lead to massive production issues. From our production lines, we know that a faulty sample accepted now means costly returns and brand damage later.
To ensure quality, your sample testing process must cover four key areas: electrical safety compliance (like Hi-Pot tests), functional performance (heating accuracy, timers), physical construction (materials, assembly), and detailed documentation of all findings for clear supplier communication.
A great sample is the foundation of a successful product launch. Let’s walk through the essential steps to guarantee your air fryer sample meets every expectation.
What key factors should I monitor when testing air fryer samples?
A beautiful sample can hide critical safety or performance flaws. In our experience, these hidden issues are what cause major headaches after mass production. A structured approach prevents these costly surprises.
You must monitor electrical safety (Hi-Pot, grounding), functional performance (heating speed, temperature stability), and physical integrity (materials, coatings, assembly quality). These three pillars determine if the product is safe, effective, and durable enough for your customers.
Dive Deeper: The Core Testing Checklist
When a new air fryer sample arrives at your office, it’s tempting to just plug it in and see if it gets hot. However, a professional evaluation goes much deeper. A comprehensive test protects your investment and your brand’s reputation. We break it down into three critical areas.
Electrical Safety1 Is Non-Negotiable
This is the most crucial part of your evaluation. A failure here is not just a defect; it’s a potential danger to your customers.
- Hi-Pot (High Potential) Test2: The unit must withstand a high voltage (e.g., 1500V AC for one minute) applied between its electrical parts and the chassis. This tests for insulation breakdown. There should be no arcing or shorts.
- Ground Continuity: The resistance between the ground pin on the plug and the metal chassis must be extremely low (typically under 0.1Ω). This ensures the safety ground is properly connected.
- Component Verification: Check that critical safety parts like the thermal fuse are present and correctly rated. It should cut power well before the unit reaches a dangerous temperature.
Function and Performance
This is where you verify the air fryer does what you promise your customers it will do.
- Heating and Temperature3: Does the unit reach the target temperature quickly? More importantly, does it maintain that temperature consistently? Use a separate digital thermometer to verify the thermostat’s accuracy.
- Timers and Controls4: Test every button and program. Ensure the timer is accurate and that all display functions work as intended without glitches.
- Noise Levels: While all air fryers make noise, it should be a consistent fan sound, not a rattle, buzz, or grinding noise. Abnormal sounds often point to poor assembly or a faulty fan motor.
Physical and Structural Integrity
This part of the test evaluates the product’s build quality and durability.
- Materials and Finish5: Check for a smooth, even finish on all surfaces. There should be no sharp edges (burrs) or scratches. The plastic should feel sturdy, not brittle.
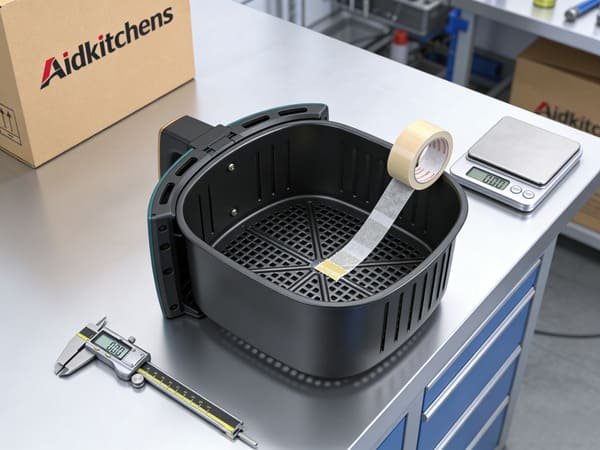
- Adhesion Tests6: For any coatings on the basket or internal parts, perform a simple cross-hatch adhesion test with quality adhesive tape (like 3M). The coating should not peel or flake off.
- Handle and Assembly: Pull firmly on the handle to ensure it’s securely attached. Check that all parts, like rubber feet, are present and properly fitted.
| Test Category | Key Checkpoint | Purpose |
|---|---|---|
| Electrical Safety1 | Hi-Pot Test & Ground Continuity | Prevent electric shock and fire hazards. |
| Performance | Temperature Accuracy & Stability | Ensure consistent and reliable cooking results. |
| Structural Integrity | Handle Strength & Coating Adhesion | Guarantee long-term durability and user safety. |
How can I ensure the testing process is thorough and objective?
Relying on memory or a "gut feeling" during testing is a recipe for disaster. We’ve seen clients approve samples based on looks, only to discover functional flaws when the first shipment arrives.
To ensure a thorough and objective process, use a standardized checklist for every sample. Compare its performance and build directly against your approved specification sheet, involve multiple people in the evaluation, and consider using a neutral third-party inspection service.

Dive Deeper: Creating a Bulletproof Testing System
Objectivity is your best tool for quality control. A subjective "it seems okay" is not enough. You need a systematic process that is repeatable and produces clear, data-driven results. This ensures that whether it’s sample A or sample B, the evaluation criteria are identical.
Develop a Standardized Testing Protocol7
Before the sample even ships, create a detailed checklist. This document should be your guide for the entire evaluation. It should list every single feature, specification, and test to be performed, with a clear space to mark "Pass," "Fail," or record specific measurements. This document transforms testing from a casual check into a formal audit. Your protocol should include everything from measuring the power cord length to timing how long it takes to preheat to 200°C.
Test Against Your "Golden Sample8" or Spec Sheet
The sample should not be evaluated in a vacuum. It must be compared directly against the "golden sample" (a pre-approved reference unit) or, more commonly, the detailed Product Specification Sheet9 you agreed upon with the supplier. Is the color the exact Pantone shade you specified? Are the dimensions within the agreed-upon tolerance (e.g., ±1mm)? Any deviation, no matter how small, should be noted.
The Value of Third-Party Inspection10
Sometimes, an unbiased expert eye is invaluable. This is especially true when dealing with complex compliance requirements for markets like the EU or USA. A third-party inspection company can perform tests in a certified lab environment, providing an impartial report on everything from material composition to electrical safety. While it’s an added cost, it provides an unparalleled level of assurance and can be a powerful negotiation tool if issues are found.
| Evaluation Method | Pros | Cons |
|---|---|---|
| In-House Testing | Lower cost, fast, direct control over the process. | Can be subjective, may lack specialized equipment. |
| Third-Party Inspection10 | Objective and impartial, certified expertise, detailed reporting. | Higher cost, requires scheduling and coordination with the factory. |
What documentation should I keep during sample evaluation?
After testing, you might find an issue but struggle to recall the exact details a week later for your supplier. Relying on memory leads to vague feedback, which our engineers find impossible to act on.
You must maintain a detailed log including photos and videos of any defects, a completed test checklist with measurements, and a formal summary report. This documentation creates an objective record that is essential for clear communication and holding your supplier accountable.

Dive Deeper: Building Your Case File
Think of sample documentation11 as building a legal case. The more precise and undeniable your evidence, the faster and more effectively your supplier can resolve the issues. This file becomes your single source of truth for the sample’s quality. Vague feedback like "the button feels weird" is unhelpful. Instead, your documentation should enable you to say, "The start button requires 8N of force to actuate, while the specification is 4±1N. See video evidence attached."
The Power of Visual Evidence
A picture is worth a thousand words, and a video is worth a thousand pictures. When you find a defect, document it immediately.
- For cosmetic flaws: Take clear, well-lit photos. Place a ruler or coin next to the flaw (like a scratch or dent) to provide a sense of scale.
- For functional issues: Record a short video. If the unit is making a strange noise, the display is flickering, or a function isn’t working, a video demonstrates the problem in a way that words cannot.
- Annotation: Use simple image editing tools to circle or point to the exact location of the defect in your photos.
The Annotated Test Checklist
Your standardized checklist12 is not just for guiding the tests; it’s a critical record. As you perform each test, fill out the results. Don’t just write "Pass" or "Fail." Add specific measurements and notes. For example:
- Power Cord Length:
Spec: 1.5m / Actual: 1.45m / Result: Pass (within tolerance) - Heating Time to 200°C:
Spec: < 3 mins / Actual: 4 min 15 sec / Result: Fail - Handle Strength Test:
Applied 100N force for 1 min. No deformation or cracks observed. Result: Pass
The Final Summary Report
Once testing is complete, compile all your findings into a concise summary report13. This document should consolidate everything into a single file to send to your supplier. It should include an overall assessment (e.g., "Sample Approved," "Approved with Revisions," "Rejected") and a list of all identified issues, referencing the specific photos, videos, and checklist notes for each point.
| Document Type | Content | Purpose |
|---|---|---|
| Photo/Video Log | Dated images/videos of each defect with scale reference. | Provides undeniable visual proof of issues. |
| Test Checklist | Completed checklist with all measurements and notes. | Offers objective, data-driven test results. |
| Summary Report | A consolidated list of all issues and a final decision. | Serves as the official feedback to the supplier. |
How do I communicate issues or concerns with suppliers?
Sending a frustrated, angry email is a common reaction to a bad sample, but it rarely solves the problem. From our side, clear, professional communication allows our engineering team to fix issues quickly.
Always communicate issues in a structured, professional email. Attach your summary report, checklist, and all visual evidence (photos/videos). Be firm but fair, state the issues objectively without emotion, and clearly define the next steps you expect from them.

Dive Deeper: Constructive Communication for Fast Solutions
The goal of your communication is not to assign blame, but to solve problems efficiently. A good supplier will appreciate clear, actionable feedback. It helps them improve their processes and deliver the product you want. Your relationship with the supplier is a partnership, and effective communication is key to its success.
Structure Your Feedback Email
Start with a clear subject line, such as "Feedback on Air Fryer Sample [Sample ID#] – [Your Company Name]". In the body of the email, be polite and direct.
- Start Positively (If Possible): Briefly mention something you liked about the sample. "Thank you for sending the sample. The overall finish and color are excellent."
- State the Main Point: Get straight to the point. "However, during our detailed evaluation, we identified several critical issues that need to be addressed before we can approve the sample."
- Reference Your Documents: Attach your summary report, checklist, and a link (e.g., to a Dropbox or Google Drive folder) to the photos and videos. "Please see the attached summary report for a full list of issues. All corresponding photos and videos are linked for your reference."
- Highlight Critical Issues: Mention 1-2 of the most serious problems in the email body itself. "The most critical issues are the failure of the Hi-Pot test (see video 1) and the incorrect heating element, which resulted in slow preheating (see test checklist, item 4.2)."
Define Clear Next Steps
Don’t leave the supplier guessing what you want. Clearly state your expectations.
- Acknowledge and Analyze: "Please review the attached report and confirm your team understands the issues."
- Request a Root Cause Analysis: For serious problems, ask for an explanation. "For the Hi-Pot failure, we require a root cause analysis14 and your proposed corrective action plan."
- Set a Deadline: Give them a reasonable timeframe to respond. "We expect your full analysis and proposed solutions within 3 business days."
- Discuss the Next Sample: "Please let us know the timeline for providing a corrected second sample (S2) that incorporates all the required fixes."
This professional and evidence-based approach removes emotion and ambiguity, making it easier for the supplier’s technical team to understand the problems and implement the right solutions quickly.
Conclusion
Thorough sample testing is your most important quality gate. By focusing on safety, performance, and build quality, you protect your customers and your brand. Document everything and communicate clearly.
-
Understanding electrical safety is crucial for preventing hazards in appliances, ensuring customer safety and compliance. ↩ ↩
-
Learn about the Hi-Pot Test to understand how it ensures insulation integrity and safety in electrical devices. ↩
-
Explore methods to verify heating accuracy in air fryers, ensuring they perform as expected for optimal cooking. ↩
-
Discover common problems with timers and controls to ensure your air fryer operates smoothly and reliably. ↩
-
Investigate the best materials for air fryers to ensure durability, safety, and performance in kitchen appliances. ↩
-
Learn how to conduct adhesion tests to ensure coatings on appliances are durable and safe for long-term use. ↩
-
Understanding a standardized testing protocol can enhance your testing accuracy and reliability. ↩
-
Learn about the importance of a Golden Sample in ensuring product quality and consistency. ↩
-
Explore the essential elements of a Product Specification Sheet to ensure clear communication with suppliers. ↩
-
Discover how third-party inspections can provide unbiased quality assurance and improve compliance. ↩ ↩
-
Understanding sample documentation can enhance your quality control processes and improve supplier communication. ↩
-
A well-crafted checklist can streamline your testing process and ensure consistent results across evaluations. ↩
-
Learning about summary reports can help you compile findings efficiently and communicate effectively with suppliers. ↩
-
Learning about root cause analysis can help you identify issues accurately and implement effective solutions. ↩